
Implementing Extended Producer Responsibility (EPR) Compliance in BrewMan
BrewMan now offers a streamlined solution for Extended Producer Responsibility (EPR) data collection, helping you accurately track packaging materials and comply with regulatory requirements. This guide covers activation, setup, data collection, and reporting for the new EPR functionality.
1. Activating EPR Functionality
Enabling EPR
Go to the Administration section in BrewMan’s main navigation.
Select System Set Up.
Locate the EPR Settings card.
Choose the appropriate Producer Status from the available options (e.g., Small Producer, Large Producer).
Benefits
Activating this feature ensures that all subsequent sales and inventory movements are correctly flagged for EPR data collection, establishing the foundation for compliant reporting.
Common Questions
Q: I don’t see the EPR Settings card. What should I do?
A: Ensure you have the necessary administrative permissions within BrewMan to access and modify System Set Up configurations.
2. Configuring EPR Bills of Materials (BoMs)
Setting Up BoMs
In the main navigation, open the Stock section, then select the EPR submenu.
Click EPR BoMs.
Click Create New (or select an existing BoM to edit).
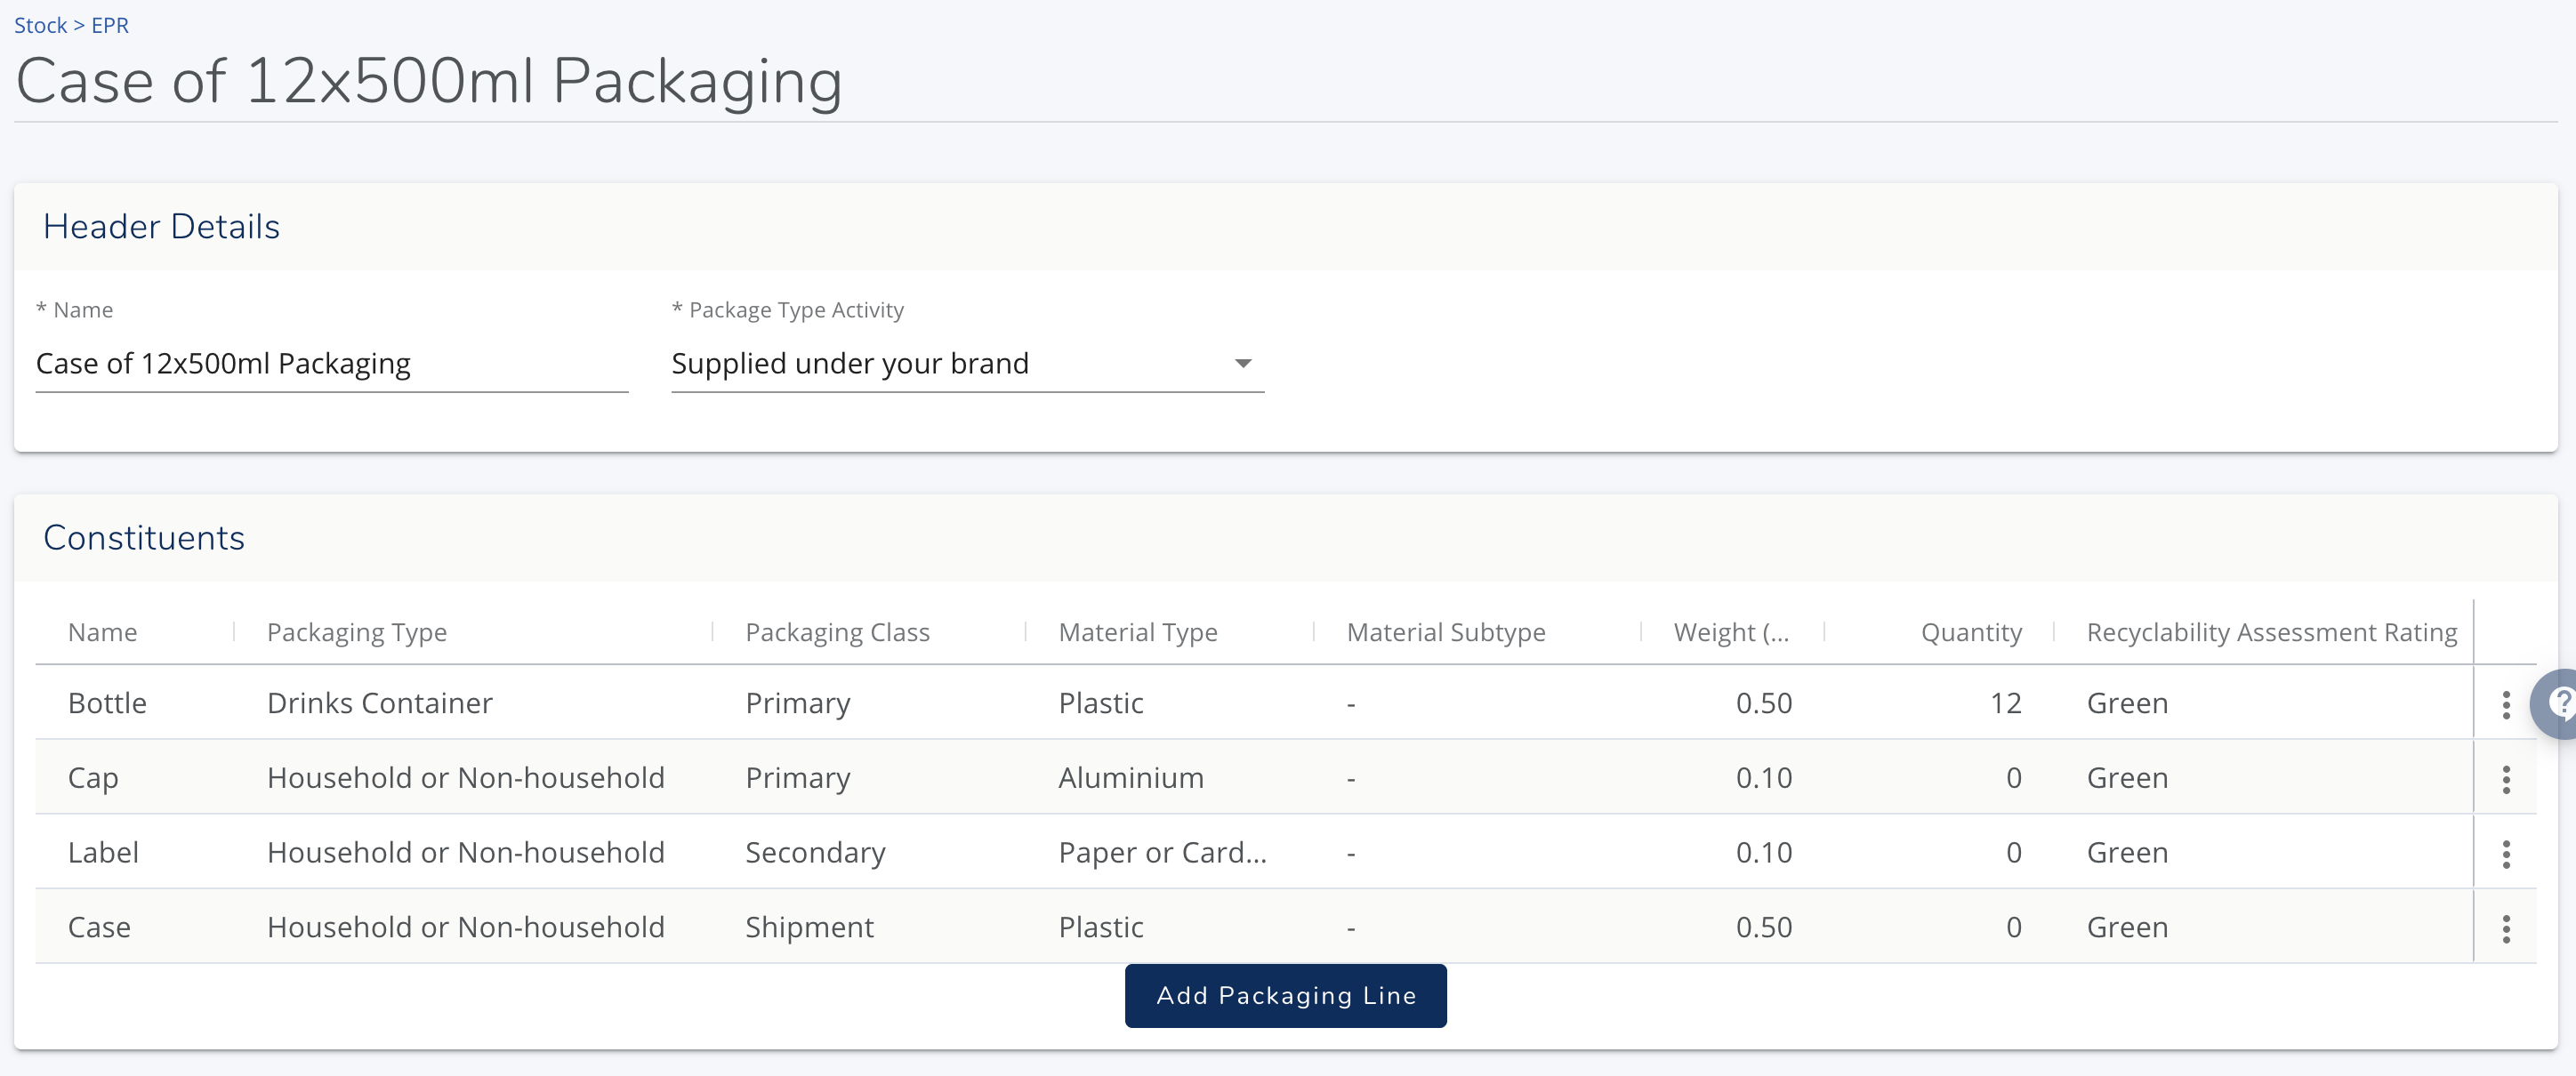
When creating an EPR BoM, you must define the following required details:
Name: A clear, descriptive name (e.g., "Standard 6-Pack Bottle Carrier").
Package Type Activity: Select the relevant category from the dropdown. Tip: Always consult official EPR guidance documents to ensure you choose the correct activity type for accurate compliance.
Finally, add constituent packaging parts (e.g., plastic wrap, cardboard, glass). You can add as many lines as necessary to accurately reflect the packaging components.
3. Assigning EPR BoMs to Package Types or Products
Linking Package Types
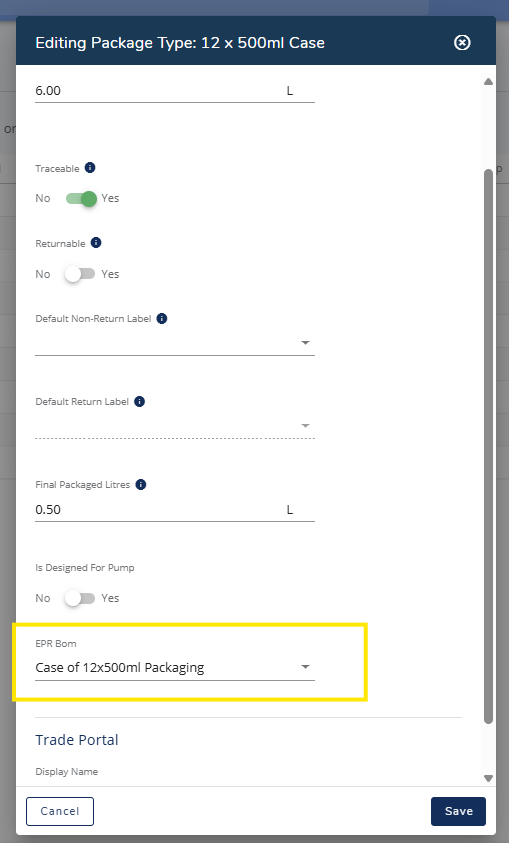
You can assign your created BOMs to your various package types which will then apply to all products associated with it. This removes the need to assign BOMs to every product.
Head to Administration > Setting > Products > Package Types
Edit the Package Type via the 3x dots on the right
Enter the BOM > Press save
Linking Products
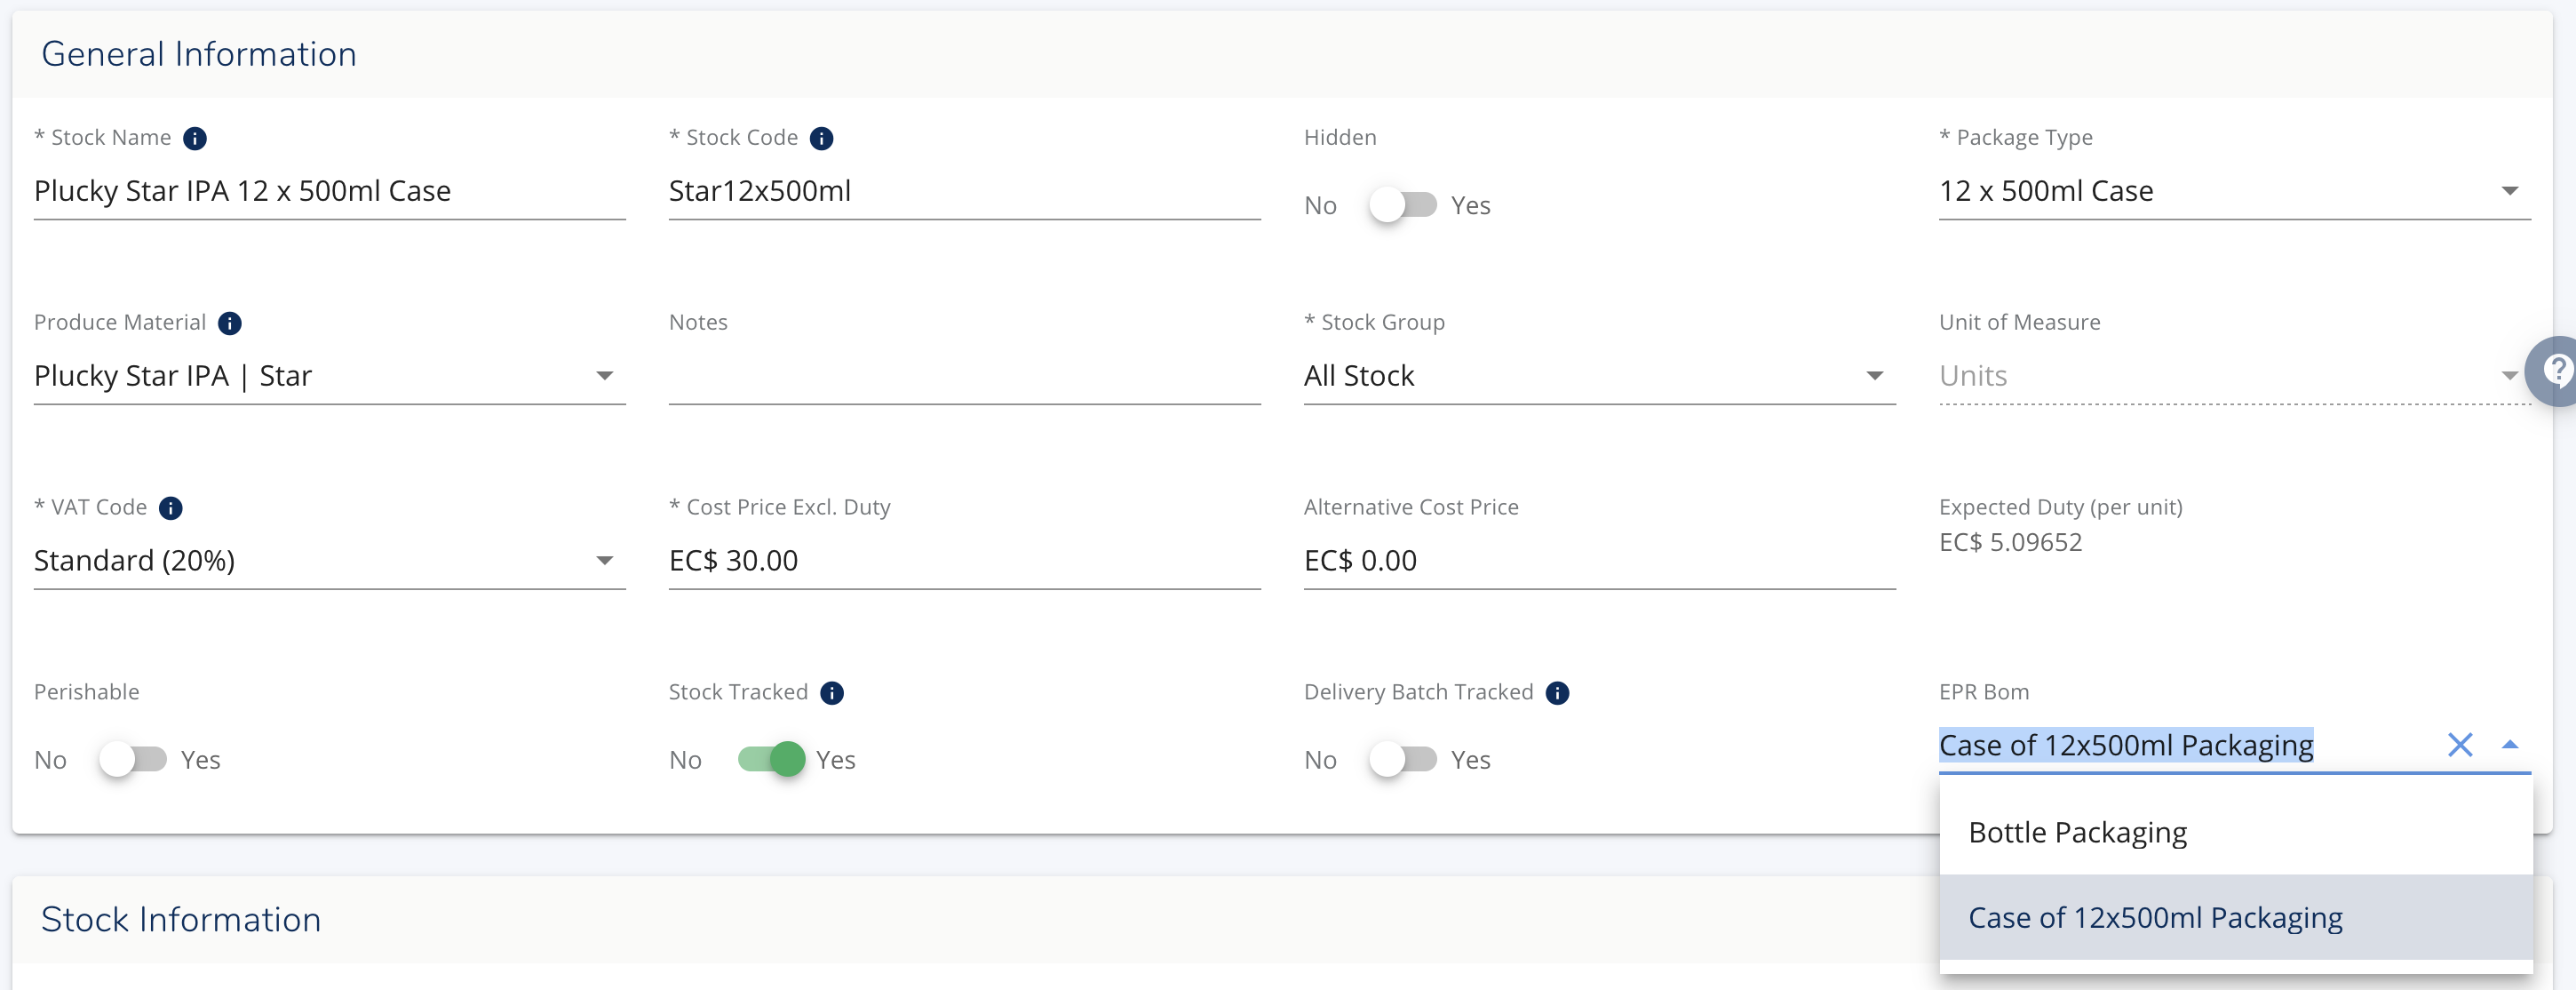
Navigate to the product record for the item you wish to link:
Locate the EPR BoM field and select the pre-configured BoM that corresponds to the product’s packaging.
Common Questions
Q: Can I use the same BoM for multiple different products?
A: Yes. If multiple products use the exact same packaging (e.g., the same case type), you only need to create the BoM once and assign it to all relevant products.
4. Automated Data Collection During Sales
How to Use It: Data Capture
Automatic Inclusion
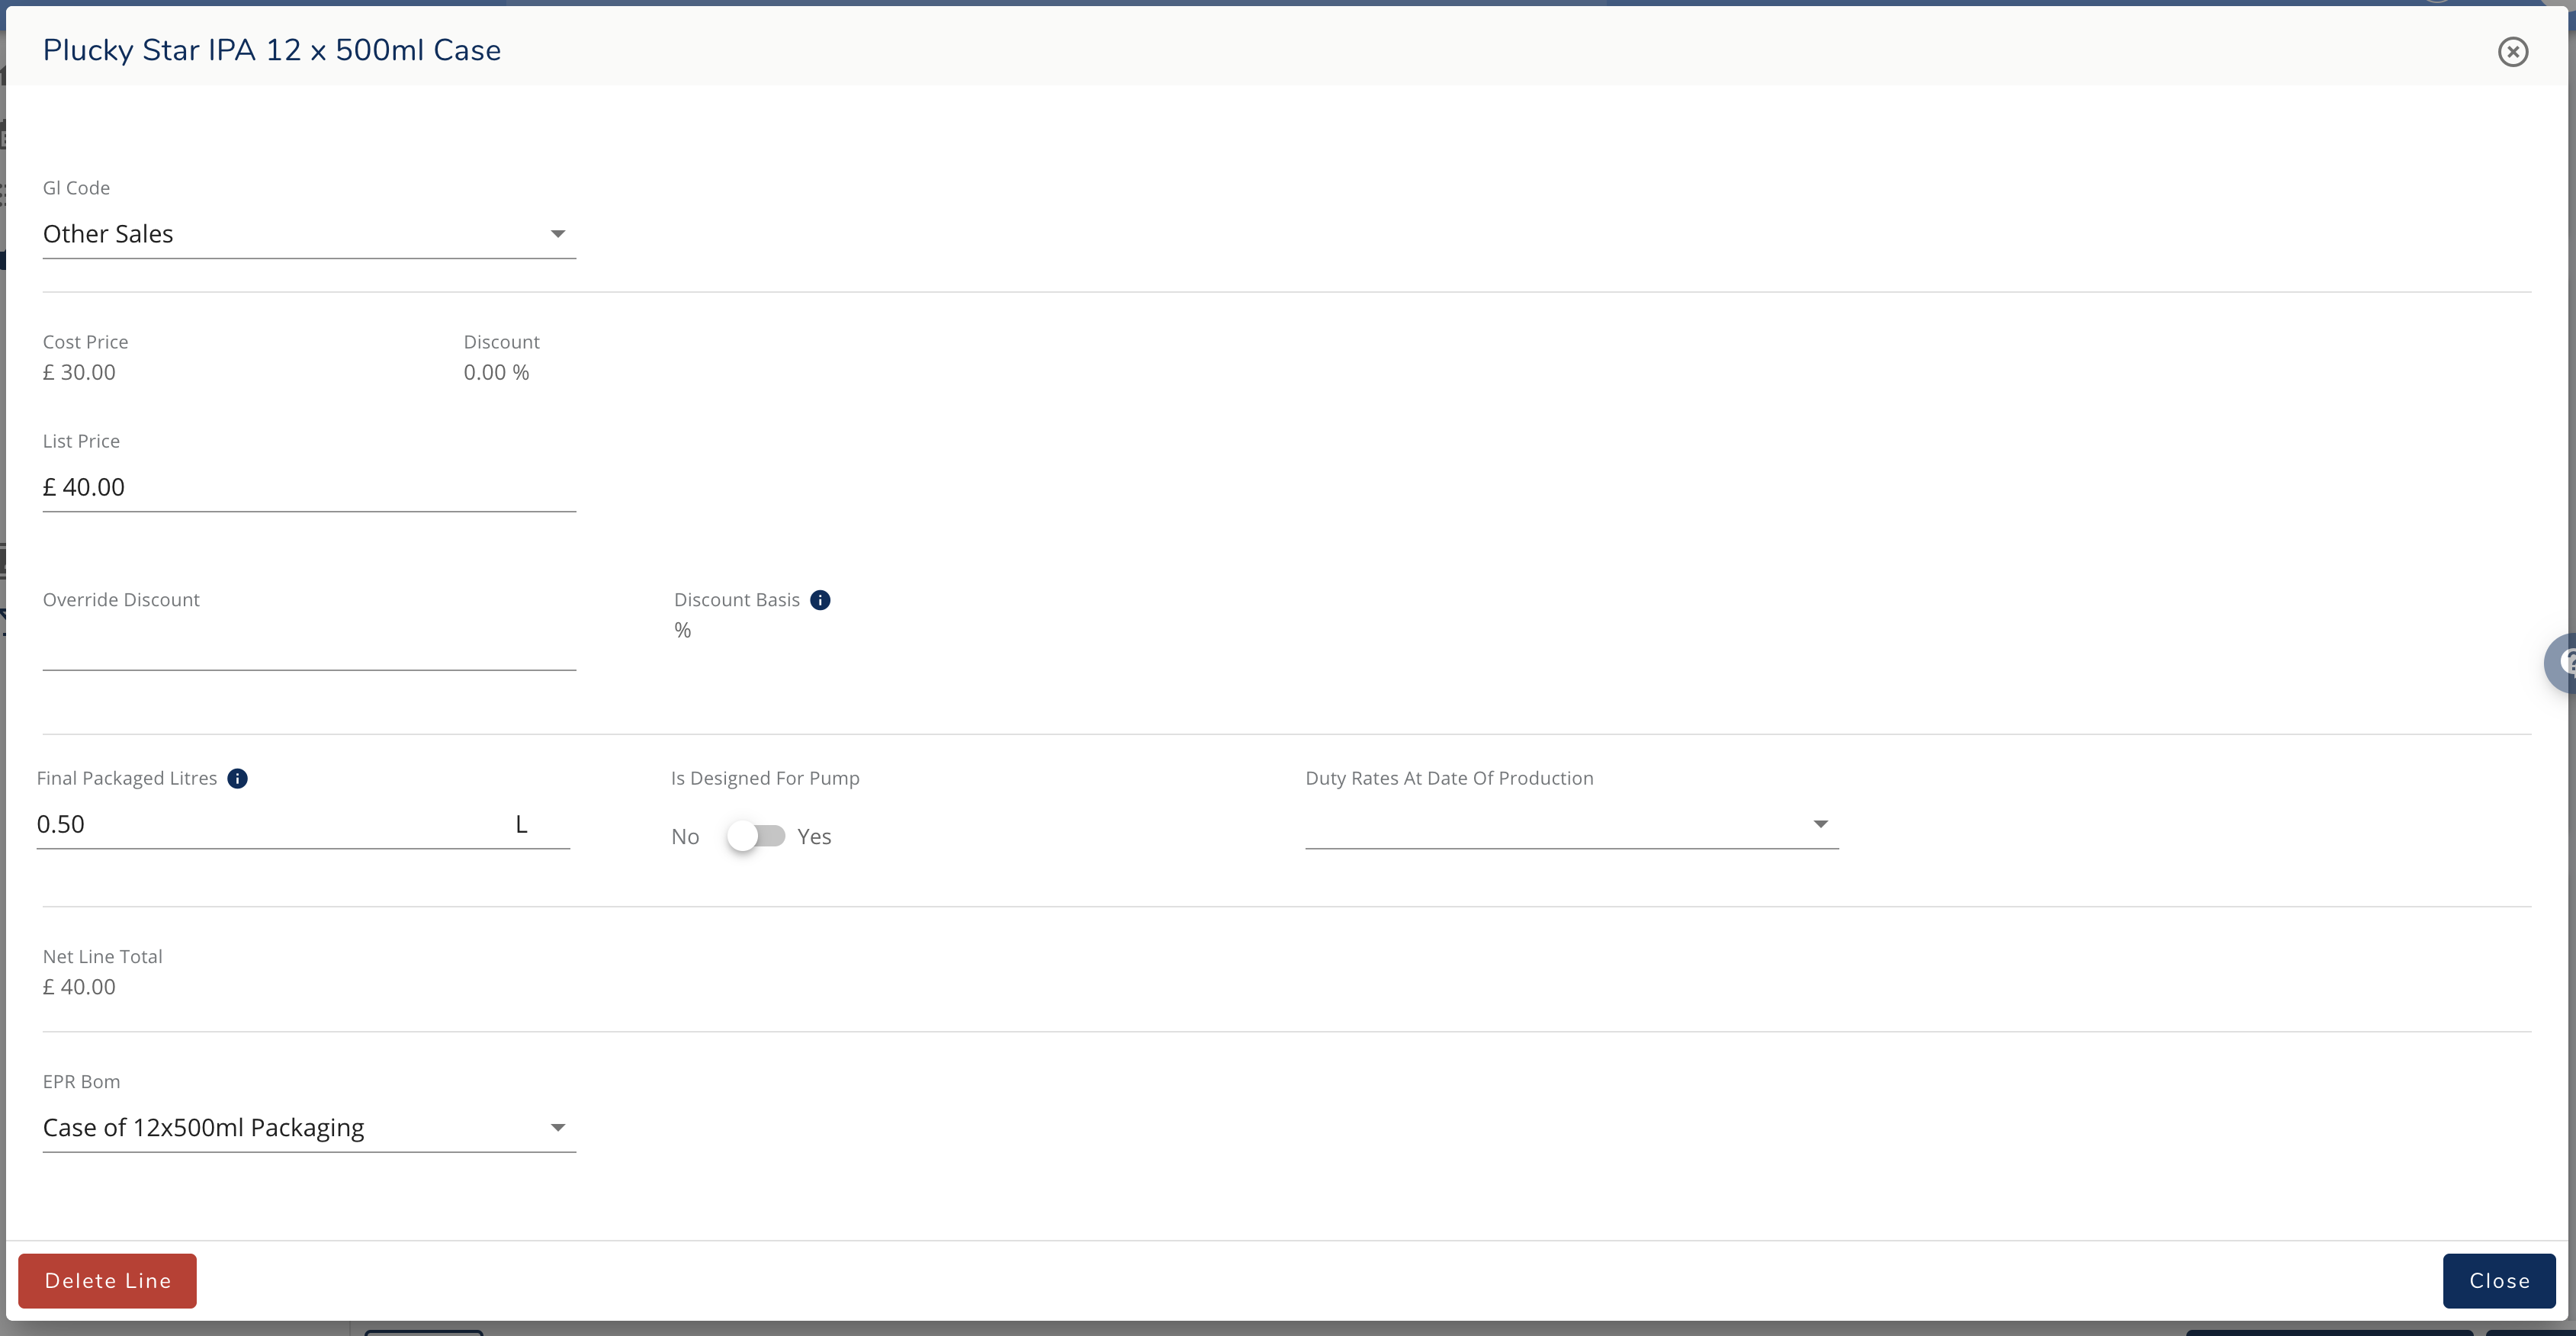
When an EPR-linked product is added to an order, the associated BoM automatically appears in the line details, ready for reporting.
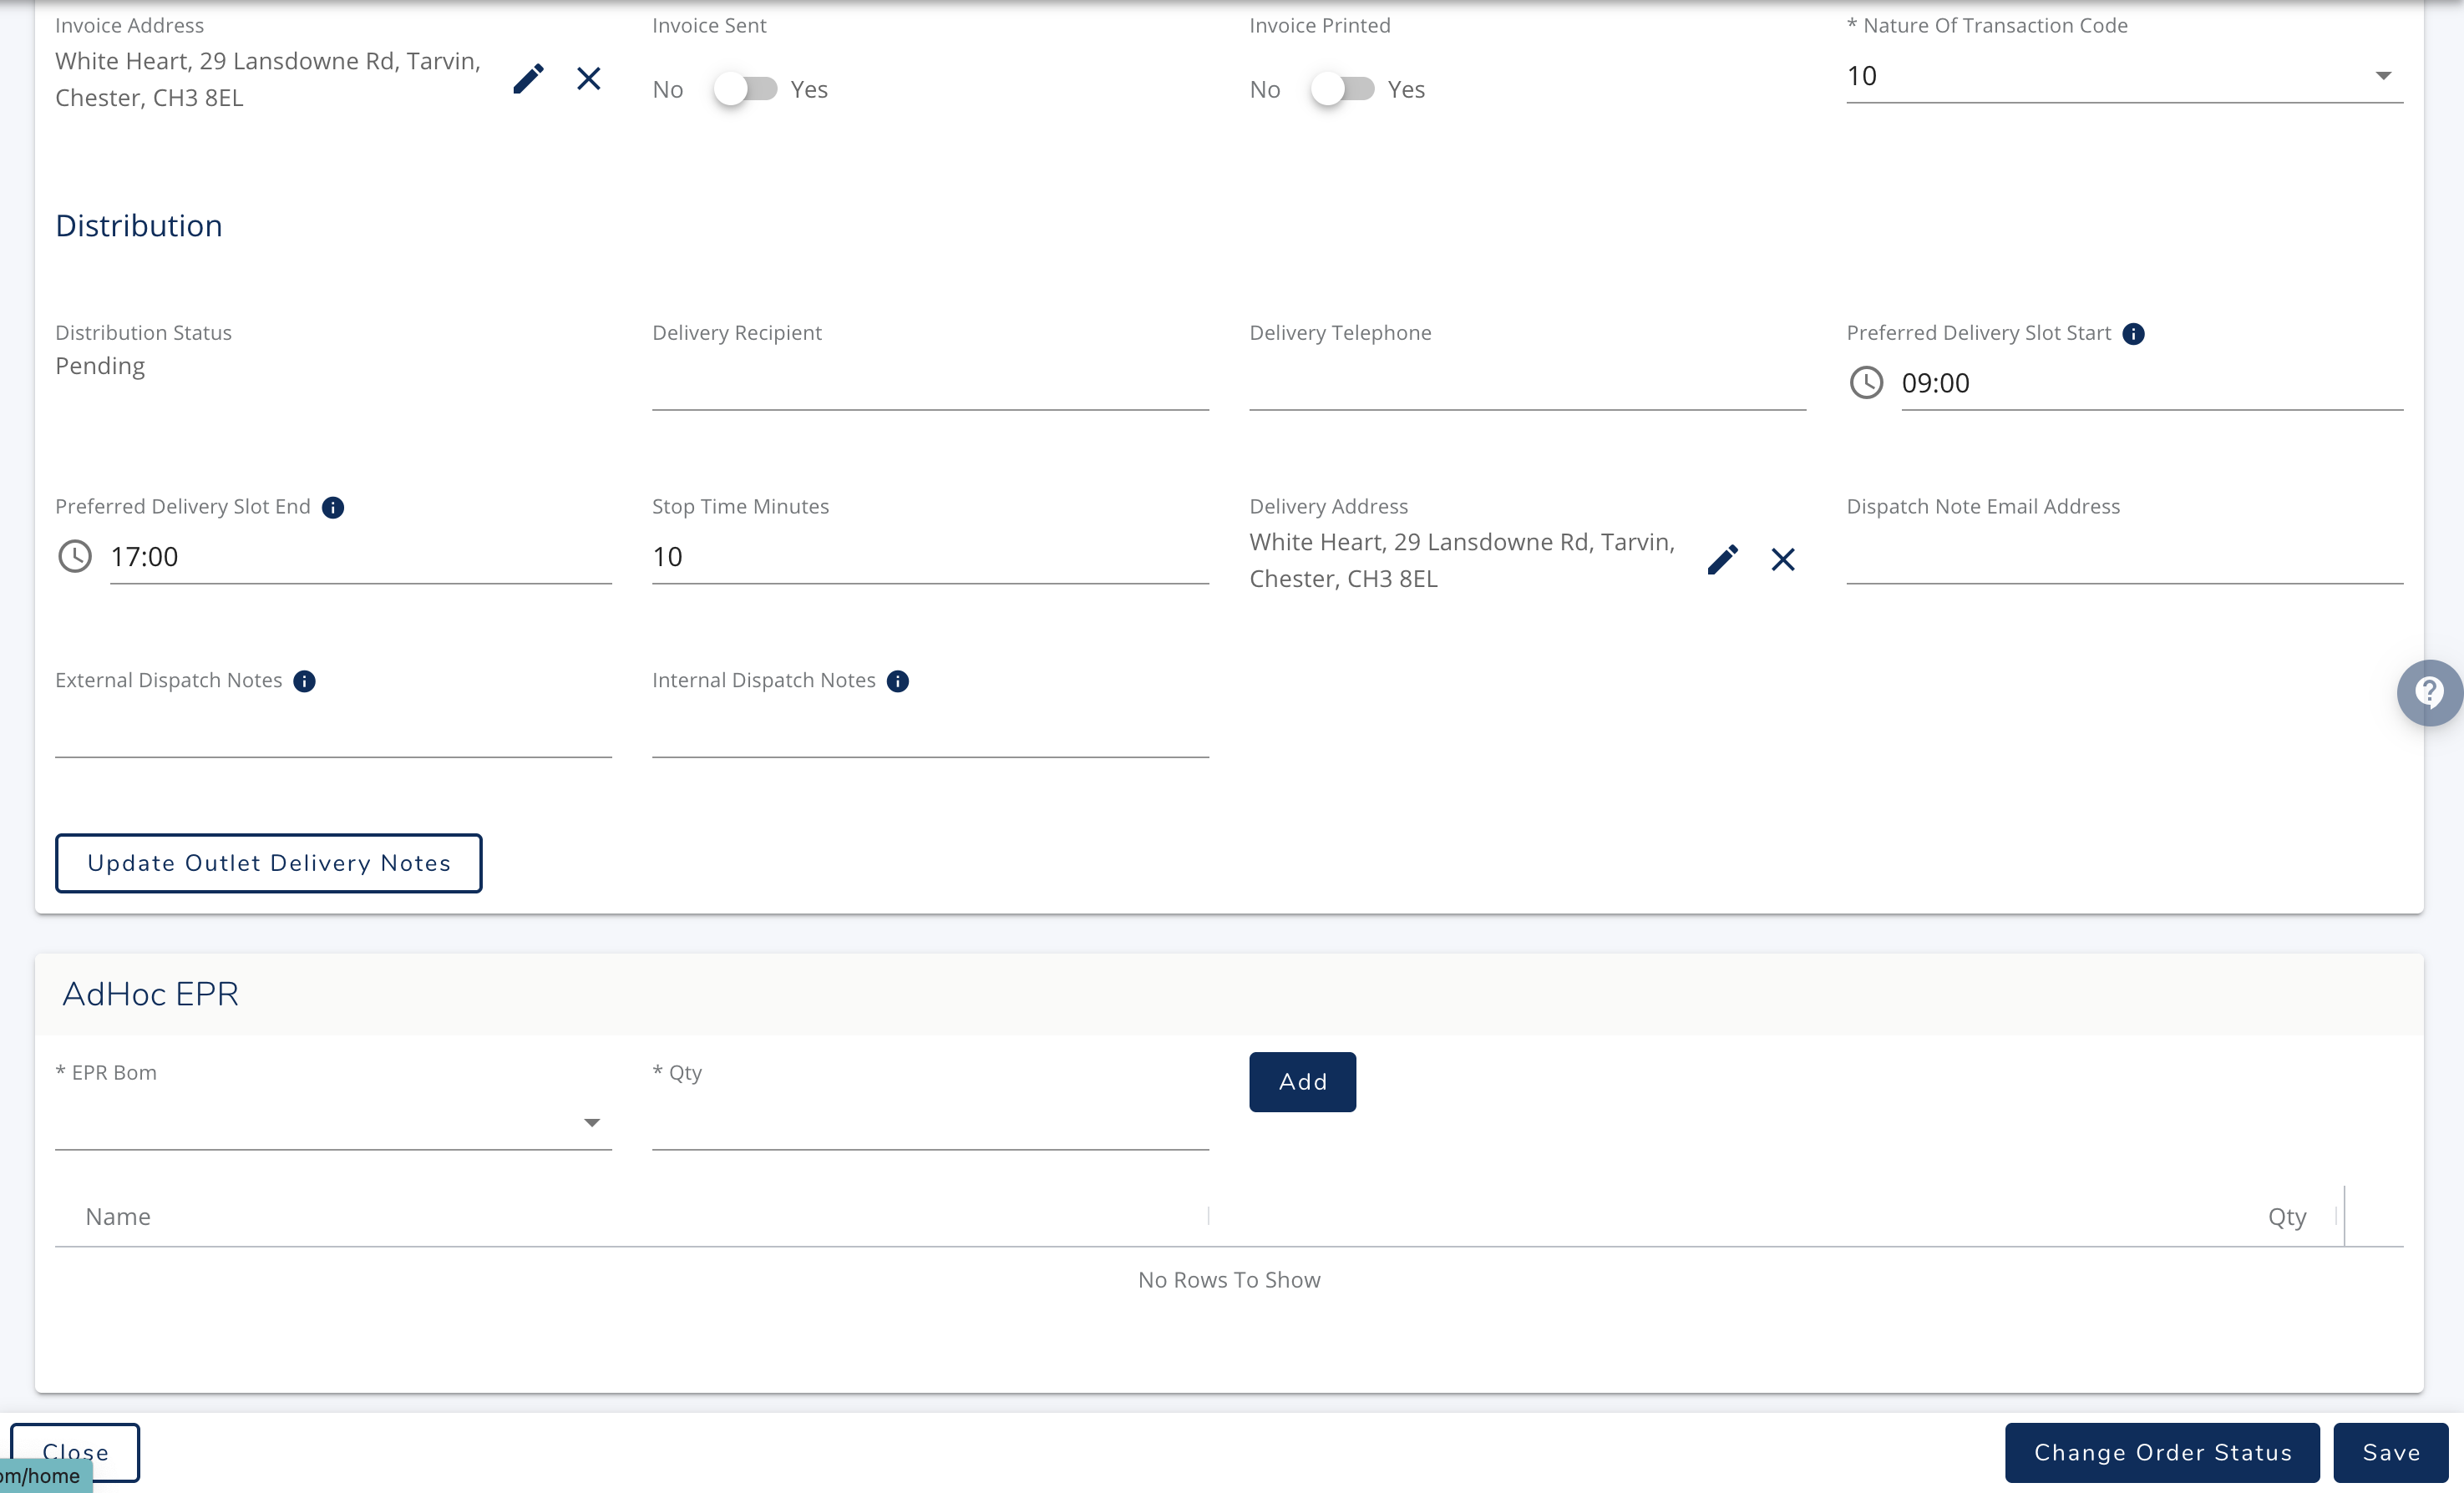
Ad-Hoc Packaging
If the order requires additional packaging not covered by the product's standard BoM (e.g., special shipping protection):
Look for the relevant EPR card near the bottom of the order screen.
Add the required EPR BoMs on an ad-hoc basis.
5. Creating and Submitting Your EPR Report
How to Use It: Generating the Report
Go to the EPR section of the navigation.
Select EPR Reports.
Click Create EPR Report.
On the report screen, you must:
Define the report’s date range.
Define any other required details.
Add any additional EPR BoMs that were not previously included in sales data, if necessary.
Once you save the report, the Lines card will automatically populate with all EPR BoM components recorded during the defined reporting period.
Submission and Review
Export: You can export the complete report as a CSV file for internal review or auditing purposes.
Submission: The system allows you to submit it directly to the relevant authority (depending on system integration).
Was this helpful?
Comments
You must be logged in to comment in this article.
Login to comment