BrewMan Trade portal allows seamless flow of orders from your own private trade portal to your BrewMan system.
Setting up and Customising the BrewMan Trade Portal
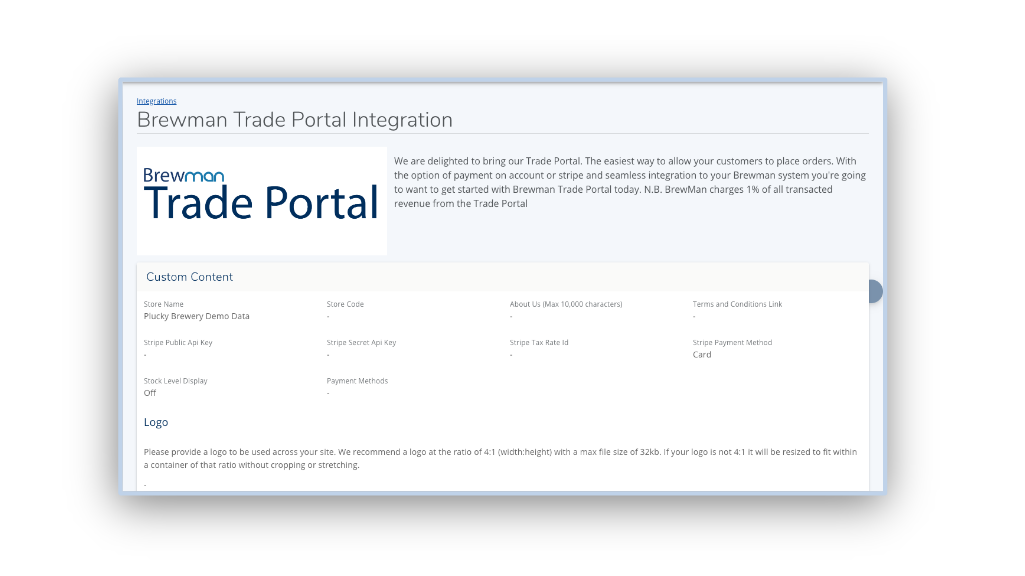
To set up the BrewMan Trade Portal, go to Integrations → BrewMan Trade Portal (Activate).
To set up the Trade Portal you will need to complete at least the required field on the set up page. This includes:
Completing the Custom Content Card Fields
Store Name (Required) : The name that users will identify your trade portal by, most likely your business name e.g. Plucky Brewery.
Store Code (Required) : Your store code will be included in the URL of your trade portal.
About You: Add a short description of your Brewery to make sure users know your brand and your ethos. This will appear in the footer of your trade portal.
Terms and Conditions Link: Add a link to the place where customers can find your Terms and Conditions of sale. This can be a link to a page on your website or a hosted document.
Stripe Public API Key: Enter the public API key from your stripe account to allow payment processing through stripe.
Stripe Secret API Key: Enter the secret API key from your stripe account to allow payment processing through stripe.
Stripe Tax Rate ID: Enter your Stripe Tax Rate ID.
Stripe Payment Method: Select how customers who checkout with stripe can pay.
Stock Level Display: Select the level of detail your stock will be shown with.
Payment Methods (Required) : Select which payment method your customers can used on to check out on the trade portal. You can choose between stripe and payment on account.
Logo: Add a logo that can be used across the trade portal. We recommend a logo at the ratio of 4:1 (width:height) with a max file size of 32kb. If your logo is not 4:1 it will be resized to fit within a container of that ratio without cropping or stretching.

Completing the Styling Cards
Colours- Select your colours which will be used for the most prominent components across the UI. You can choose a primary and secondary colour that will be used to emphasise your brand identity.
You can also select an "On Primary" and “On Secondary” colour which will be used for text and icons against your primary and secondary colours. For example the label on a button.
When picking colours, please make sure there is enough contrast between the Colour and the "On" Colour to be accessible. Using high contrast colours will mean that important elements stand out and text is easy to read even for those with visual impairments such as colour blindness. We recommend using a site such as https://colourcontrast.cc/ to check the contrast between your colours is sufficient.
Typography- Select the fonts used across your portal. The selected Brand Font will be used for short, high emphasis pieces of text such as Page titles. This font can be more decorative and reflect your brand. The selected Body Font will be used for longer passages of text, and places where the text is smaller and therefore requires higher readability. Avoid expressive or decorative fonts for body text because these can be harder to read at small sizes. Your site will use the font Roboto by default if none are selected.
Managing Customer Access to the BrewMan Trade Portal
Once a contact has been created and saved there will be a card on their record called “Trade Portal” from this card you can manage the contacts access to the Trade Portal.
If the customer has not been given access previously the card will contain an “Invite Contact” Button.

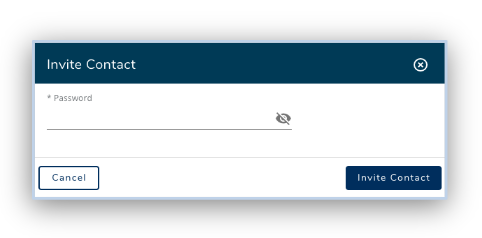
If you select to Invite the contact you will be shown a pop-up where you can select a temporary password for the user. This will be sent to them along with a link to the portal. They will be required to change their password upon initial sign in.

Once the customer has been invited their access can be revoked or you can re-invite them from this card.

Allowing Customers to pay on account
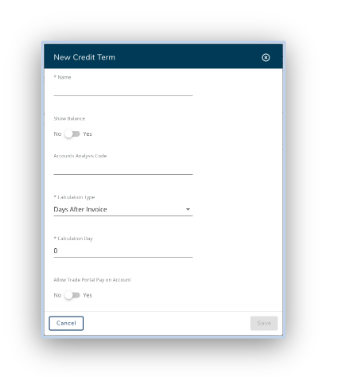
If you would like customers to be able to pay on account, the outlet they belong to will need to have credit terms that allow payment on account through the trade portal. (Editable on Contacts → Outlet → Finance → Credit Terms)
This will require credit terms to have the “Allow Trade Portal Pay on Account” toggle on the credit terms setting to be set to Yes. (Editable on Administration → Settings → Contacts → Credit Terms)

Was this helpful?
Comments
You must be logged in to comment in this article.
Login to comment