Leads will help keep track of prospects, allowing you to move leads along the Pipeline until they become an Outlet in BrewMan. This will allow you to log communication, create tasks and keep track of new customers while on the go.
Creating a lead
The most efficient way to add your leads in bulk would be to use the Import function. Go to Sales → Leads Pipeline and click Import Leads. This will redirect you to the New Data Import page where you will be able to select Leads as the Data Type and Download the Example File. For more information on Imports click here.
Alternatively, you can create a new Lead within Sales > Leads and click Create Lead in the bottom right corner of the page. Or, go to Sales > Leads Pipeline and click Add New Lead.
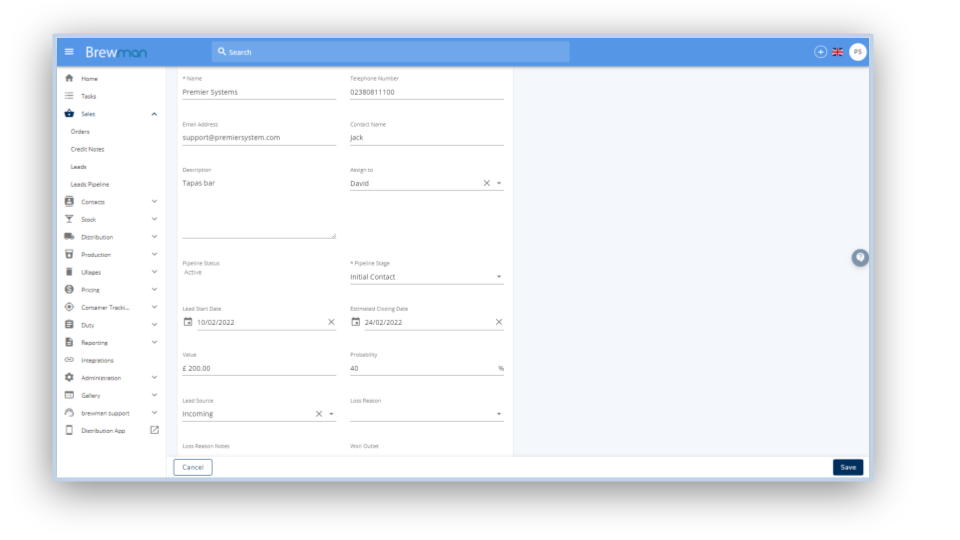
When creating a new Lead, the only essential fields are the Name of the business and the Pipeline Stage, enabling you to add them quickly.
You will have the option to add the following details at any time:
Name, Telephone Number, Email Address, Contact Name.
Description - Add a description for the Lead.
Assign To - Choose a BrewMan user to assign the Lead to. A user can then filter the pages to show leads assign to themselves.
Pipeline Stage - Choose which stage of the Pipeline the Lead will start at.
Lead Start Date & Estimated Closing Date - Add dates to show when contact began and an expected date for when you will turn the lead into an Outlet.
Value - Add a monetary value to the Lead.
Probability - State the probability of turning the Lead into an Outlet on the system.
Lead Source - Add how you came in contact with the
The remaining fields: Loss Reason, Loss Reason Notes, Won Outlet will be used at a later stage.
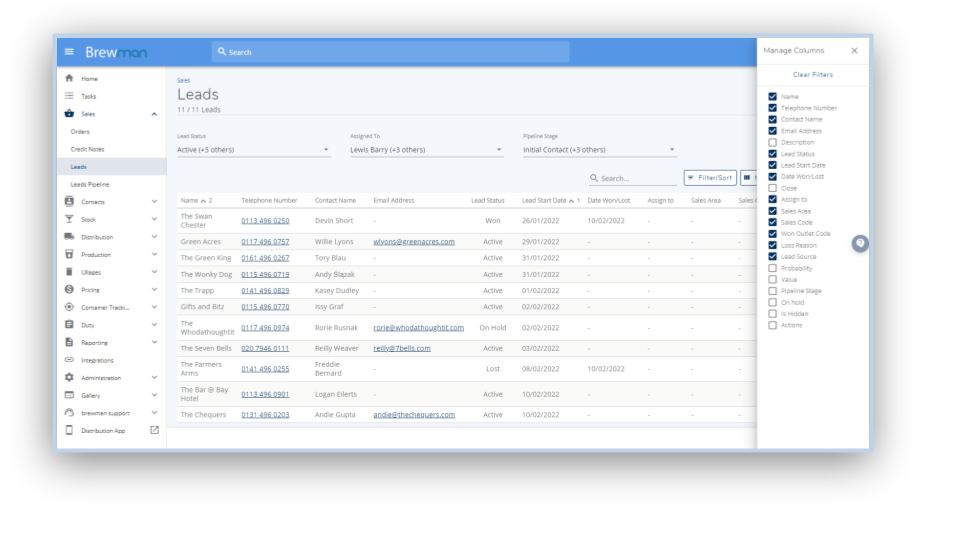
Sales → Leads will show a detailed view of all of the Leads in the system. Click Manage Columns to edit which Lead details are shown on the page.
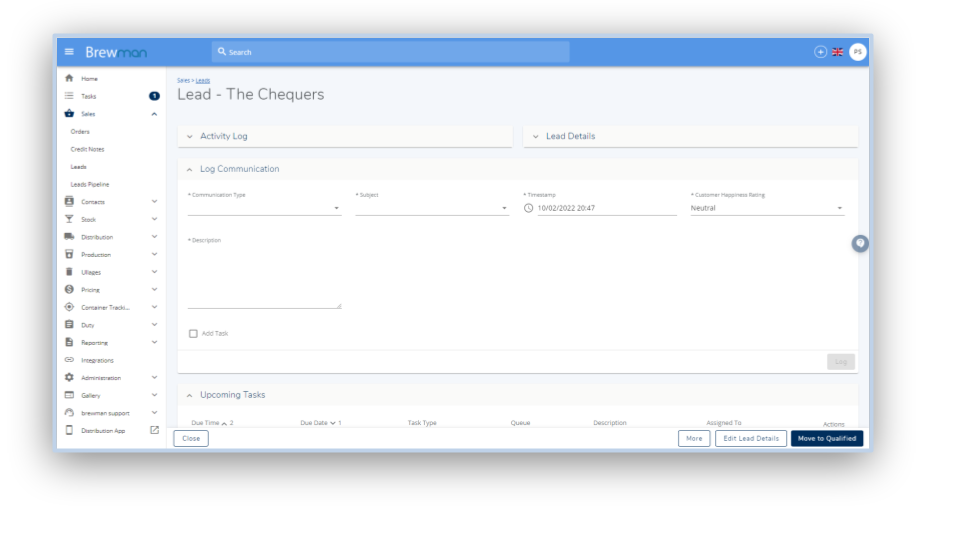
Click on a Lead to see the Lead's Activity Log and Details. On this page, you can also Log Communication , view and add to Upcoming Tasks as well as Upload any relevant Documents.
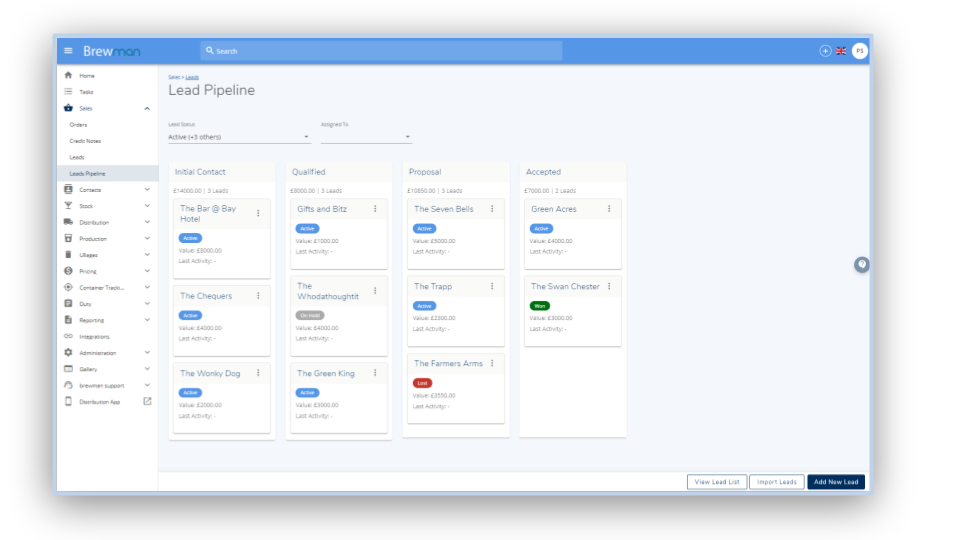
Once Leads are in the system, you will be able to see them on the Leads Pipeline.
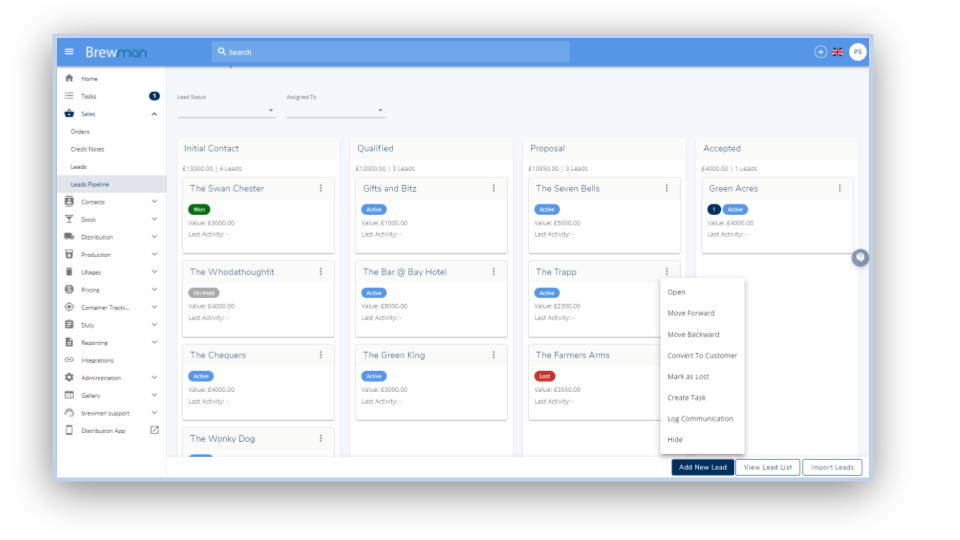
Leads Pipeline will show an interactive view of Leads in the system. Move Leads along the Pipeline by dragging and dropping to the desired stage.
Click on the 3 dots and then click Open to see the page previously mentioned. Here you can Log Communication, view and add to Upcoming Tasks as well as Upload any relevant Documents.
Creating a customer or Marking as Lost
When ready, you can create the Lead as a customer in the system and begin creating orders for them. To do so you can click on the 3 dots and then click Convert to Customer or, you can open a Lead within Sales > Leads , then click More → Convert to Customer.
You can create an order for a Lead once they have been converted as a customer.
If the Lead does not follow through, you may wish to mark them as Lost. You can do this by going Sales > Leads, clicking into the Lead, then clicking More → Mark as Lost. Alternatively, you can mark a Lead as Lost on the Pipeline by clicking on the 3 dots and then clicking Mark as Lost.
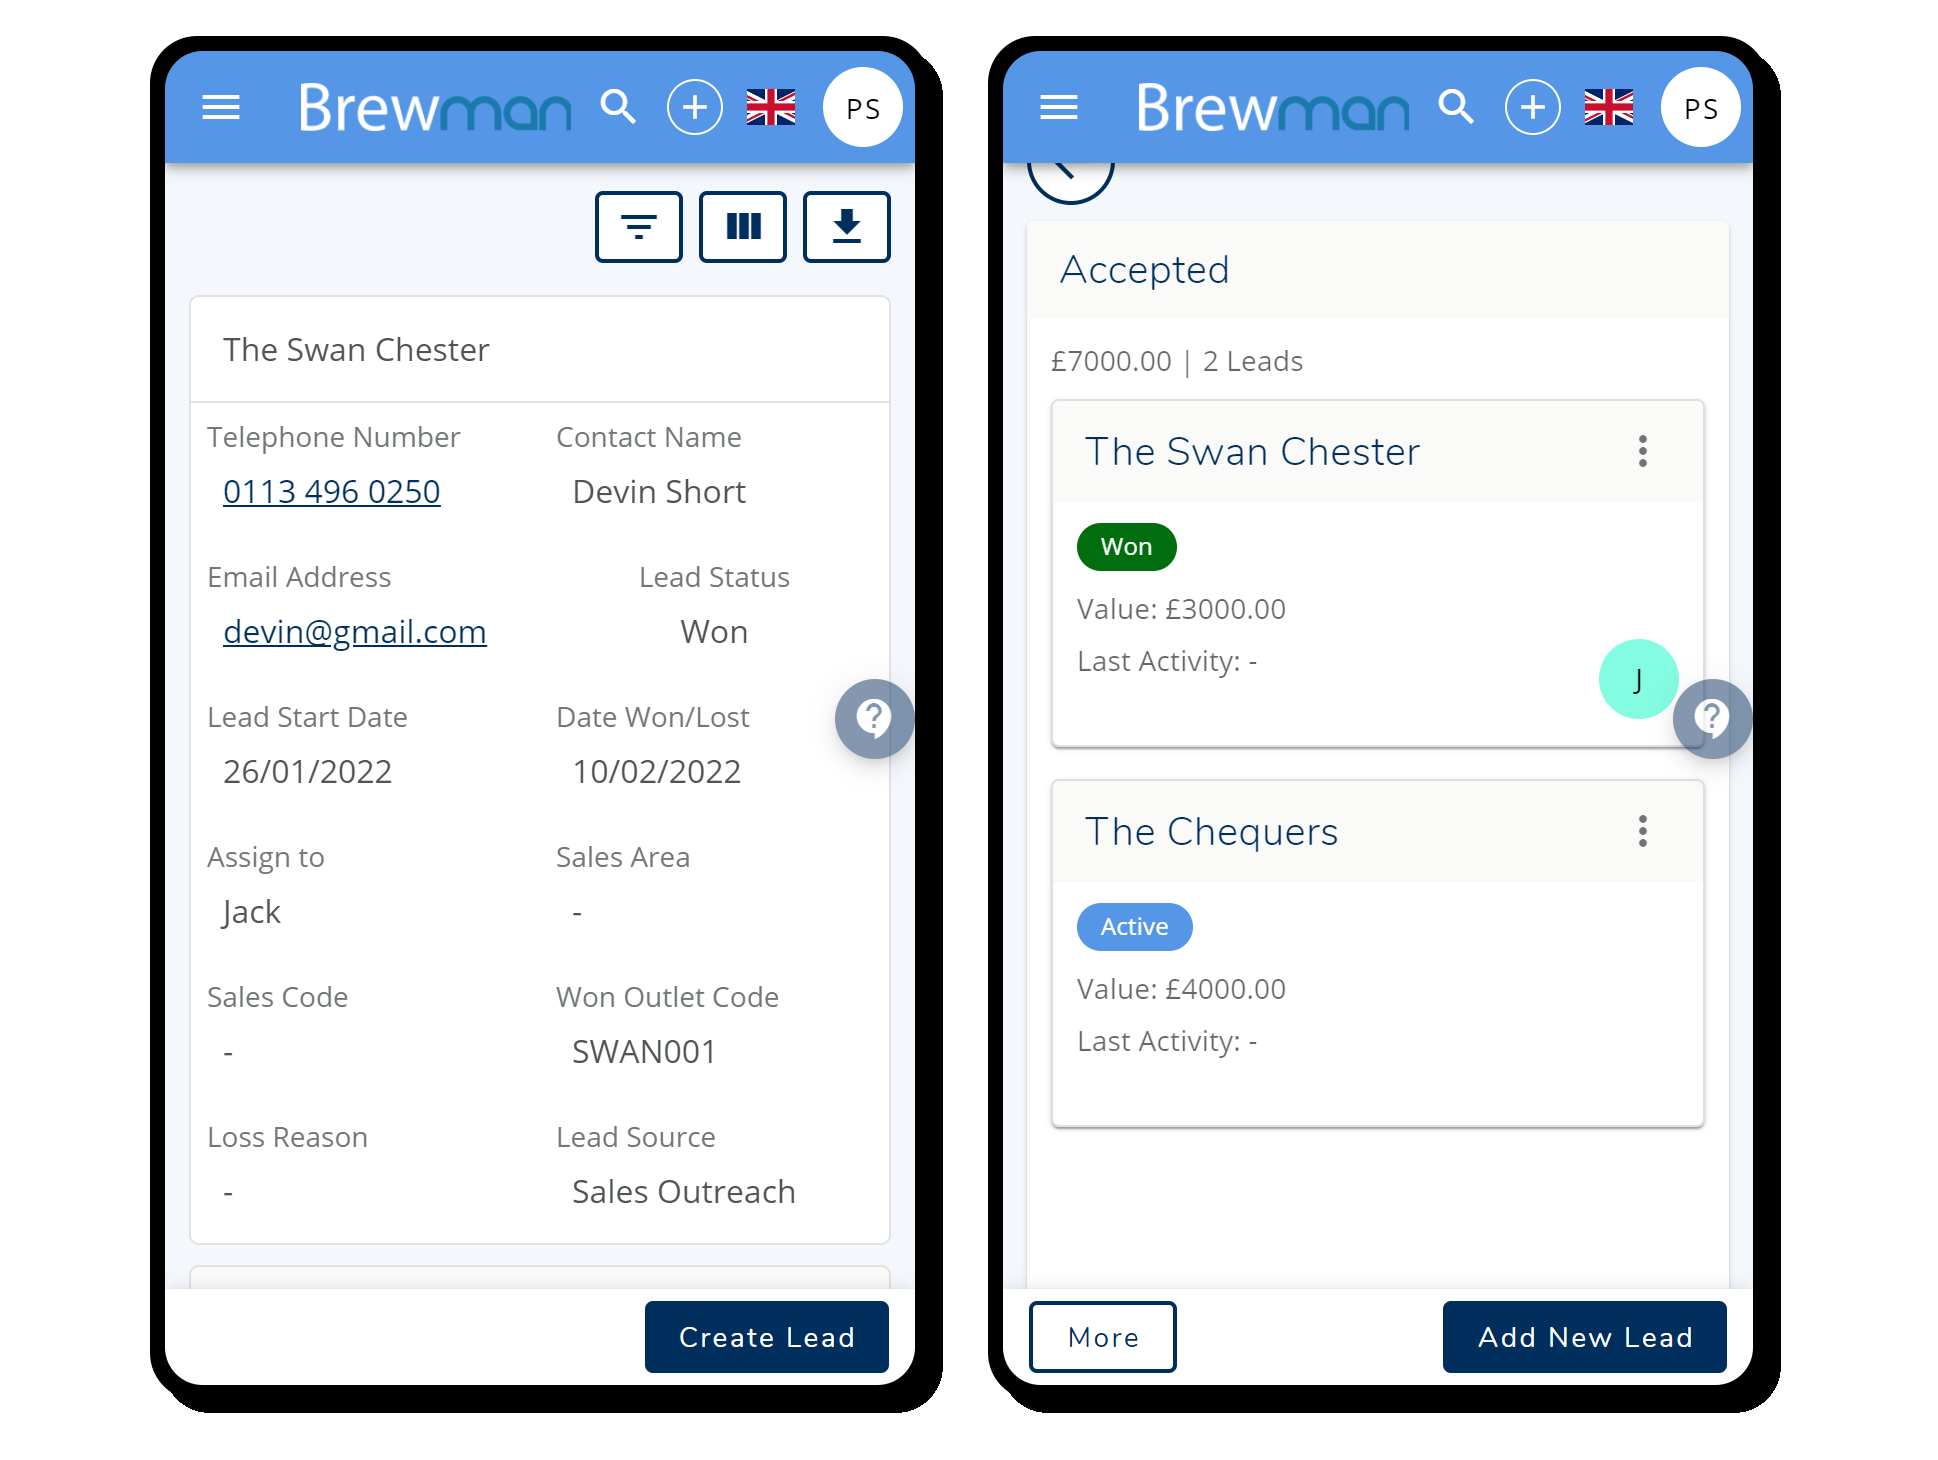
As seen below, you can access Leads on the go!
Was this helpful?
Comments
You must be logged in to comment in this article.
Login to comment