Accounts
Xero, Quickbooks and Sage Business Cloud.
BrewMan can send across customer and supplier information, along with invoices, credits, and purchase orders. Some codes will need to match those in your accounting software. These codes are explained in more detail in the setup guide:
Credit Terms
VAT Codes
GL Codes - These will be the account codes in Xero.
Material Code
Product Code
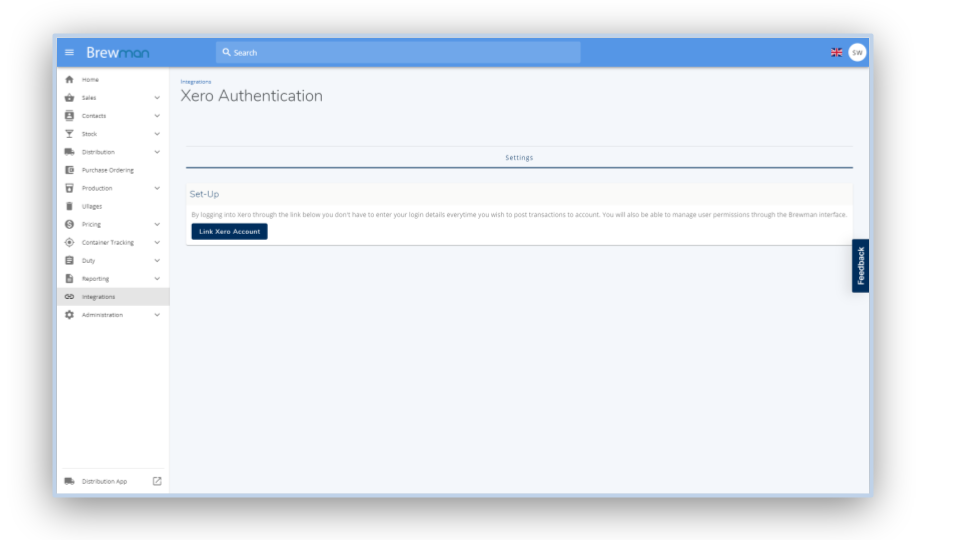
To set up your Xero integration, go to Integrations > Xero - Activate , then click Log into Xero.
To set up your Quickbooks integration, got to Integrations → Quickbooks - Activate , then click Log into Quickbooks.
To set up your Sage Business Cloud integration, got to Integrations → Sage - Activate , then click Log into Sage.
Sales
WooCommerce
BrewMan allows for the import of online orders created from your WooCommerce/WordPress webshop, meaning all of your stock, duty, and deliveries are kept in one place. Before setting up the integration, you will need to ensure that your product SKUs in your WooCommerce shop match the Product Codes of your Products in BrewMan.
You will also need to generate an API key that is “Read” type. We suggest calling this key “BrewMan”. This document from WooCommerce details how to do so: WooCommerce API Key Document. From this section in WooCommerce, you will need the:
Consumer Key
Consumer Secret If you do not have access to this information on WooCommerce, you will need to contact your provider.
To set up this integration, go to Integrations and click WooCommerce - Activate.
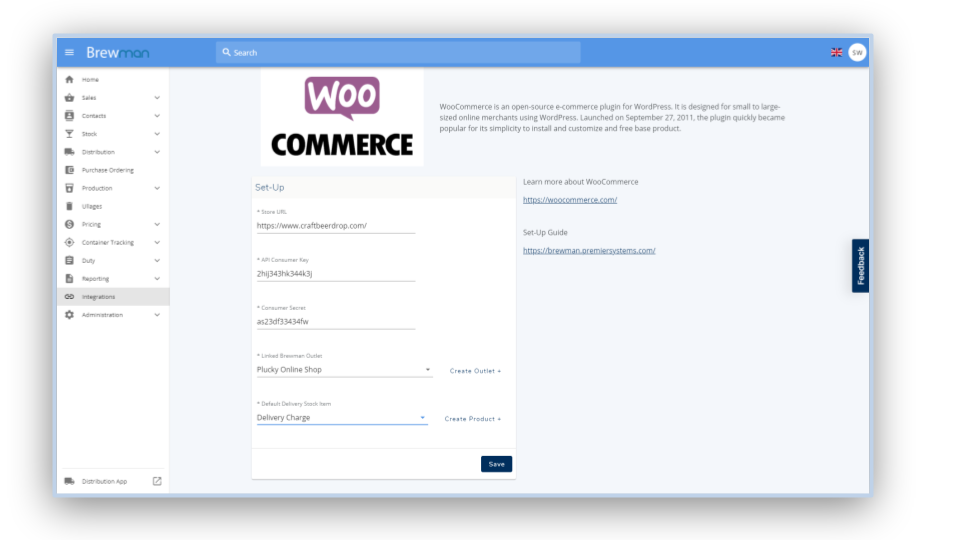
Store URL - This is the web address of your Admin Console the above steps were carried out on, minus all the information after the .co.uk or .com. For example, if my Admin Console was http://www.mybrewery.co.uk/wp-admin/admin.php? my API URL would be http://www.mybrewery.co.uk.
API Consumer Key - This is the Consumer Key collected in the previous steps.
Consumer Secret - This is the Consumer Secret from the previous steps
Linked BrewMan Outlet - This will be an Outlet specifically for your webshop. It will need to have a Retail Pricelist set up and have an Outlet Rating that allows orders. BrewMan will use the Distribution Type to generate the delivery date, which can be amended as needed.
Default Delivery Stock Item - If you require adding a delivery charge, you will need a BrewMan Product to do so. This will be added automatically by the system but can be amended.
If the Outlet or Delivery Stock Item has not been set up yet, click the appropriate Create button next to the field.
When all information has been entered, click Save.
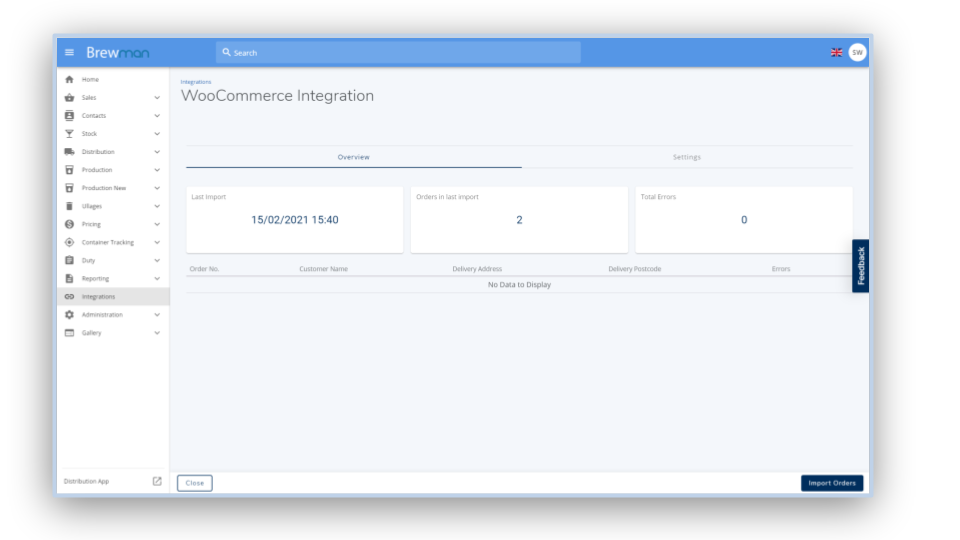
On the next screen, click Import Orders. Any new Orders in Woocommerce will be brought into BrewMan. These will be listed in the Sales → Orders page or go to the Sales History tab in your Linked BrewMan Outlet. You can then distribute these as normal.
Shopify
BrewMan allows for the import of online orders created from your Shopify webshop, meaning all of your stock, duty, and deliveries are kept in one place. Before setting up the integration, you will need to ensure that your product SKUs in your Shopify shop match the Product Codes of your Products in BrewMan.
To set up this integration, go to Integrations and click Shopify → Activate.
Shop Name - This is the name of your Shopify webstore, not the URL address. You can find this in your Shopify account in the top left, please see the screenshot further down this page.
Linked BrewMan Outlet - This will be an Outlet specifically for your webshop. It will need to have a Retail Price List set up and have an Outlet Rating that allows orders. BrewMan will use the Distribution Type to generate the delivery date, which can be amended as needed.
Default Delivery Product - If you need to add a delivery charge, you will need a BrewMan Product to do so. This will be added automatically by the system but can be amended.
Misc. Product ID - BrewMan will allow Products in Shopify that have the ‘AllowBrewManMiscellaneous’ tag set on them to be imported and assigned to a specified miscellaneous BrewMan Product.
Price List - This should be a Retail Price List that will set the gross prices of your Products on your Shopify site.
Ignore Orders Before - Set this date to avoid bringing in Orders through the integration that you have already recorded in your accounts software. This is to prevent them duplicating after processing in BrewMan.
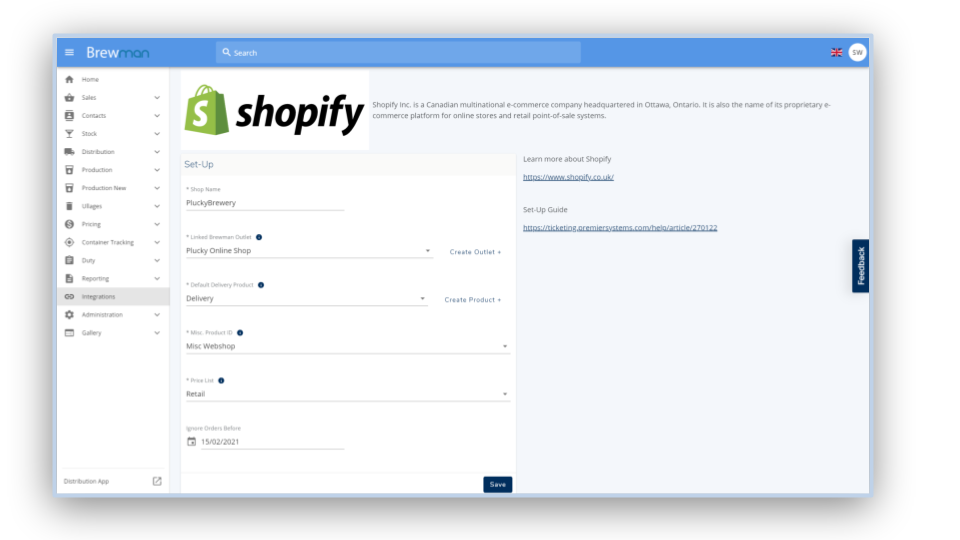
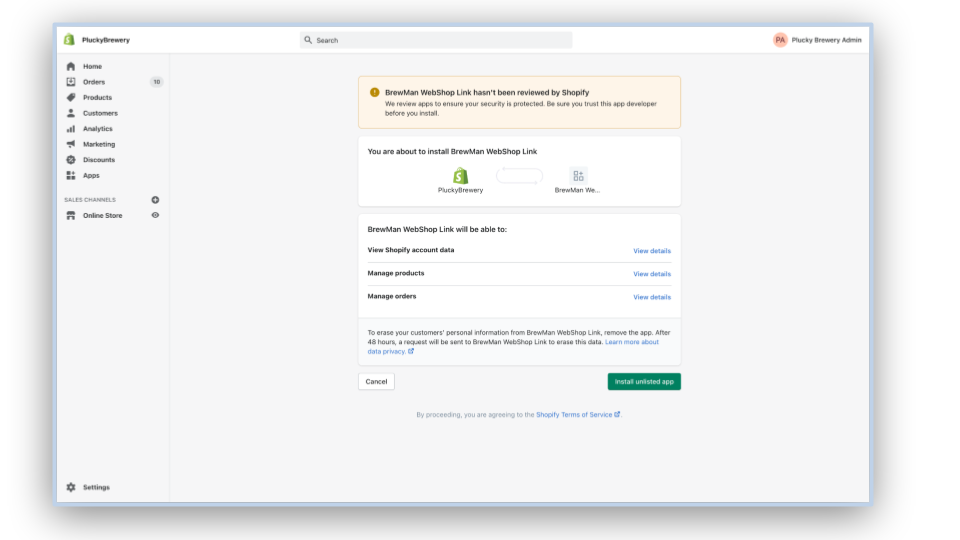
When all information has been entered, click Save. You will now be taken to your Shopify account. Click Install Unlisted App to complete the integration.
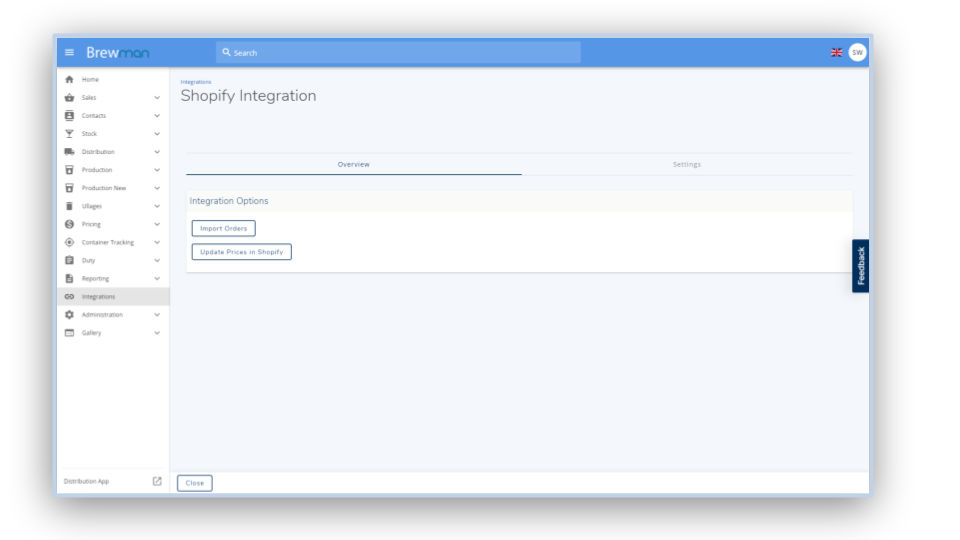
In BrewMan, you will now be able to click Update Pricing in Shopify or Import Orders.
If you click Import Orders, any new Orders in Shopify will be brought into BrewMan. These will be listed in the Sales → Orders page or go to the Sales History tab in your Linked BrewMan Outlet. You can then distribute these as normal.
Was this helpful?
Comments
You must be logged in to comment in this article.
Login to comment