Ullage Labels
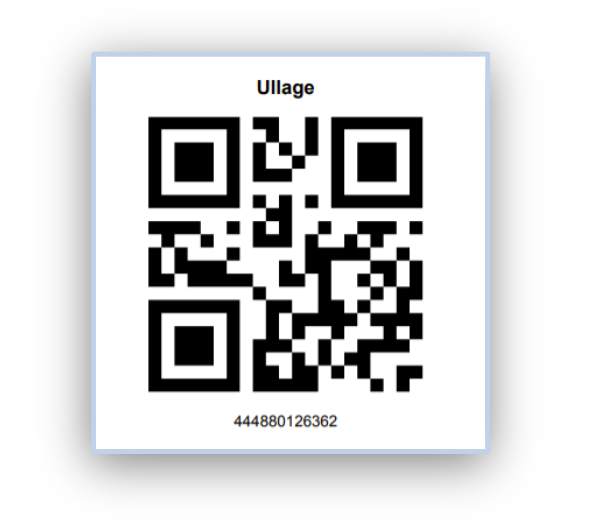
Go Ullages → Ullage List, then click Print Ullage Labels.
You can then select the number of labels you would like to print. These labels are unique but they are not tied to a specific Ullage until they are scanned.
Creating a new Ullage
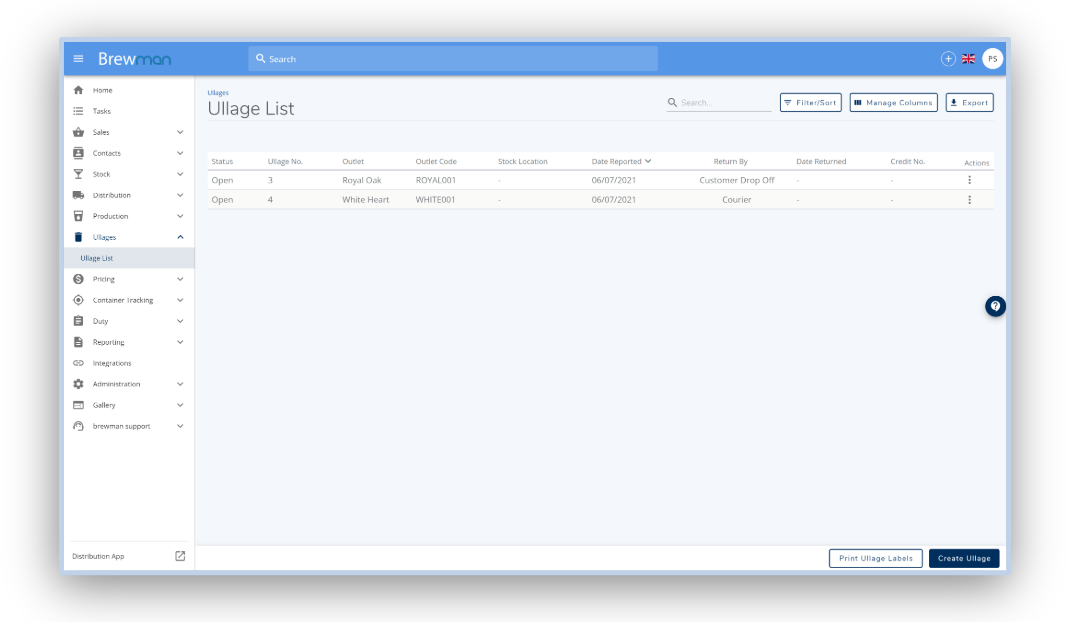
Go to Ullages → Ullage List, then click Create Ullage.
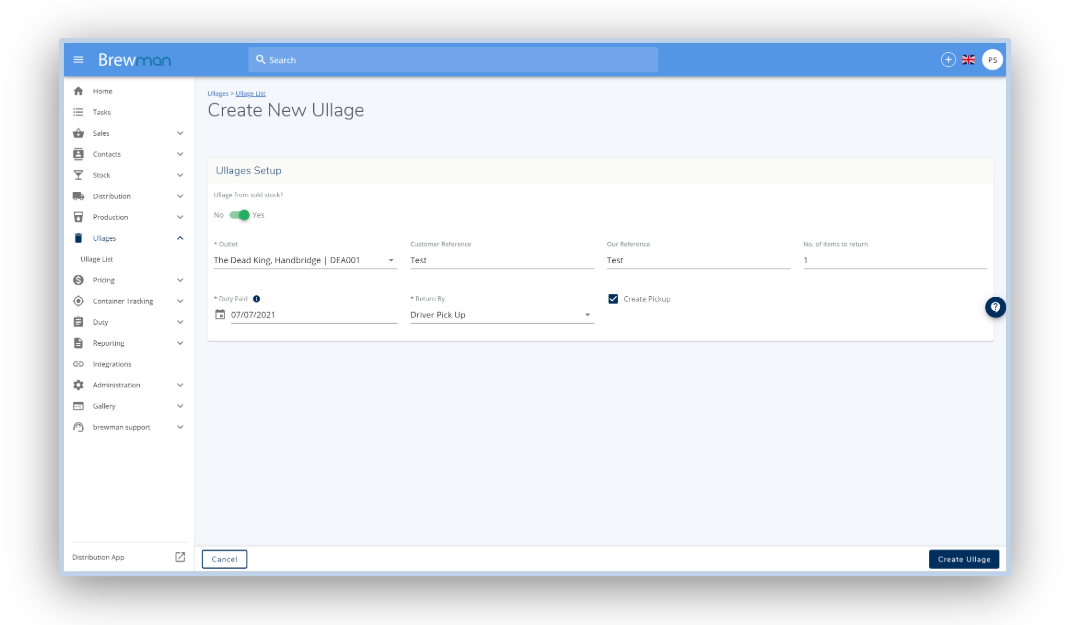
Ullages Setup
If the Ullage is Not Sold Stock, select the Stock Location and add a Reference. Once completing this type of Ullage a Stock Movement will alter the stock levels in the Stock Location specified.
If the Ullage is Sold Stock:
Select the Outlet which has reported the Ullage.
Enter any references and how many items need to be returned if you know this information.
Add the Date that Duty was incurred to reclaim the correct Duty.
Select how the Ullage will be returned, if Driver Pickup, you will be given the option to Create Pickup by clicking the checkbox.
Once this information has been filled in click Create Ullage.
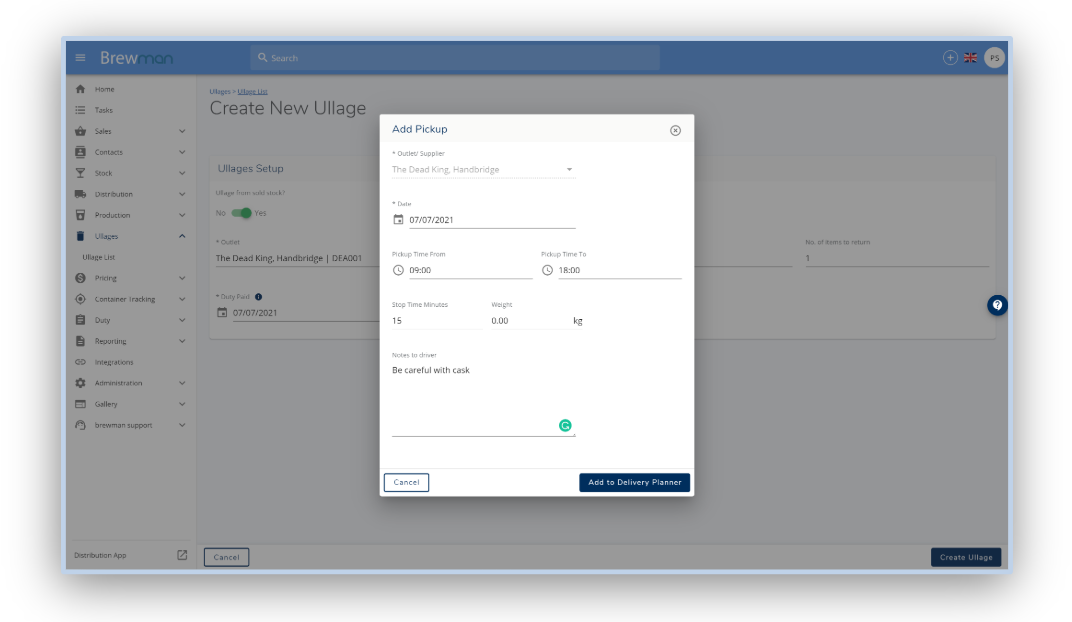
If Driver Pickup was selected then you will be able to schedule a Pickup which will appear in the Delivery Planning page to be added to a Journey. Add any Notes which will be available to your driver when collecting the Ullage on the Distribution App. Once you have selected the date and time of the Pickup, click Add To Delivery Planner.
On the Ullage Page, you are able to see and edit the details of the Ullage and record the Items to Ullage.
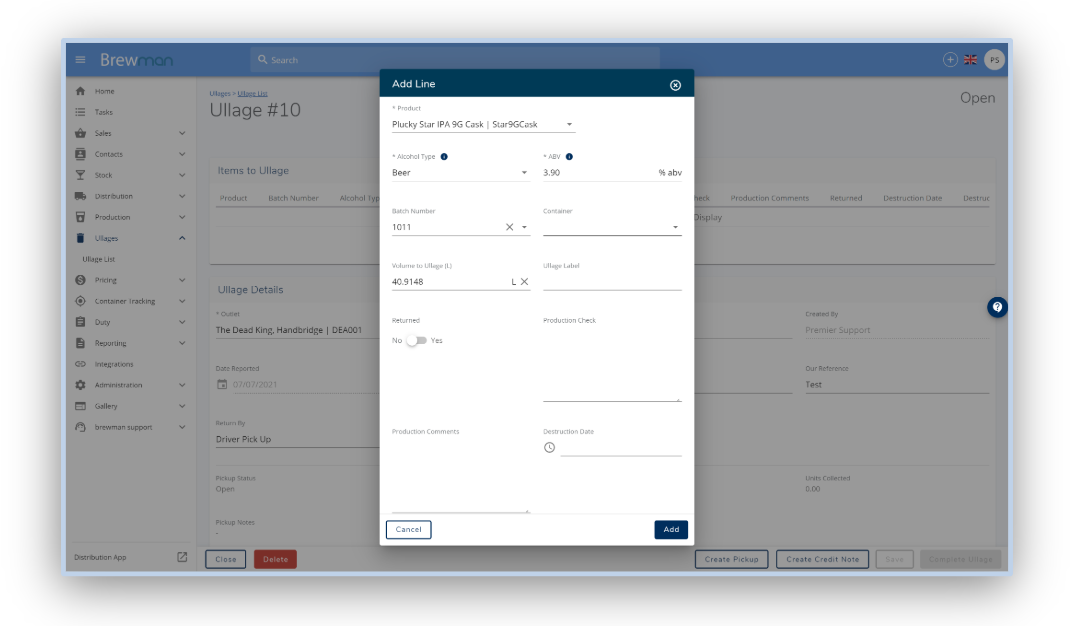
To add a Product to the Ullage click Add Line. Add any of the information you can at this stage so that the correct item is picked up. Any information you do not know can still be entered later through the Distribution App or back on this screen once the item has been returned.
Select the Product
Enter the Alcohol Type and If the Ullage is Not Sold Stock, select the Stock Location and add a Reference. Once completing this type of Ullage a Stock Movement will alter the stock levels in the Stock Location specified ABV
Enter the Batch number and Container number once you know this information
Enter the Volume to Ullage, this can be changed once the item has been inspected
Save at any point and come back to it here or in the Distribution App if a Pickup is scheduled
Collecting the Ullage
If Pickup was selected the Ullage will now appear on the Delivery Planning page.
Go to Distribution → Delivery Planning
The Ullage can then be added to a Journey either manually or by clicking Optimise all deliveries.
Once the journey has been started in the Distribution App and the driver is at the correct stop, the following options will be available:
Notes to Driver
Collect Ullage
Collect Signature
Add Notes.
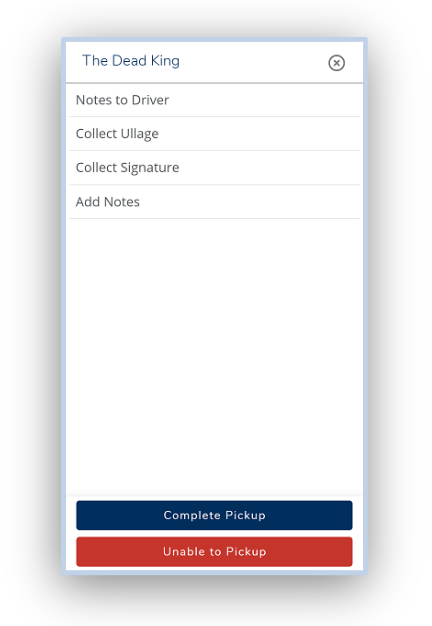
Notes to Driver are any notes which were entered when the Pickup was created.
To collect the items click Collect Ullage. If any information has been entered about the Ullage, the driver will see the Products which need to be collected. By clicking the Collect Items button at the top of the page the driver can scan or manually enter the items they are collecting. An Ullage Label should then be put on the item and scanned.
The Ullage Label ties the item to the Ullage in the system.
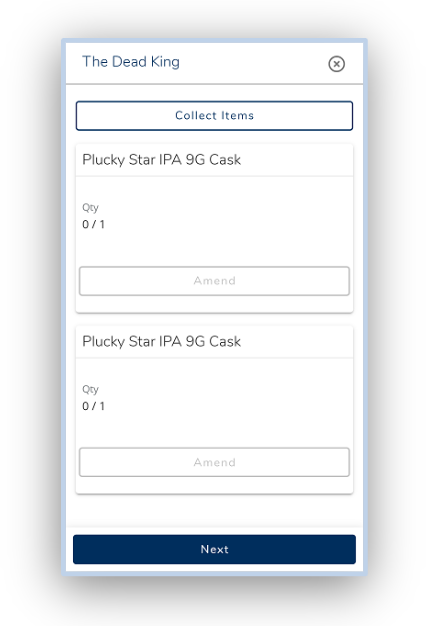
Once all of the items have been scanned and collected the driver should then click next and collect the customer signature. This will be held against the Ullage as proof that the Pickup occurred.
Completing the Ullage
Once the Ullaged Products have been returned you can then complete the process.
Return to the Ullage record → Go to Ullages → Ullage List and select the required Ullage.
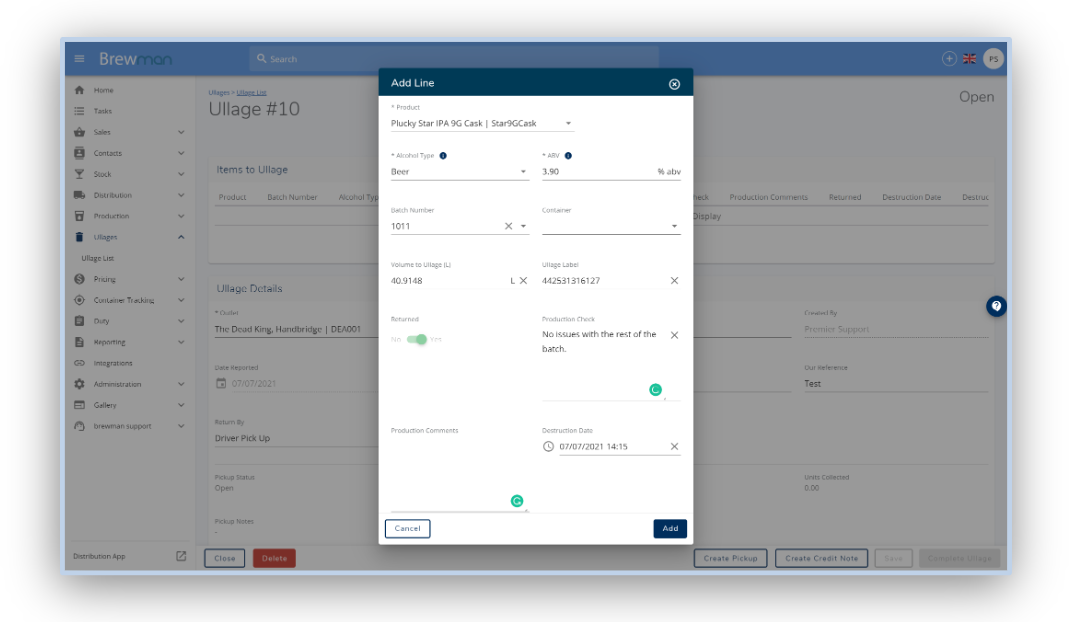
Click on the Product you wish to destroy.
If the product was collected through the Distribution App, it will be marked as Returned. If it was collected in another way you will need to mark it as Returned.
Record any Production Checks or Production Comments and amend the Volume To Ullage.
Enter a Destruction Date and Destruction Time once the Product has been destroyed.
If you need to credit the customer, click Create Credit Note. The help page on how to create a Credit Note can be found here.
Once all Products on the Ullage have been processed and any Credit Notes have been completed, click Complete Ullage. This will make the record read-only and update your duty calculation as required.
If the stock was Not Sold a Stock Movement will reduce the Stock Levels
Was this helpful?
Comments
You must be logged in to comment in this article.
Login to comment